Project 1 - Part 3 - Azure Budget Setup and Cost Control
Project 1 - Part 3 - Azure Budget Setup and Cost Control
Overview
After the website, API, custom domain, and Cloudflare setup were working, the next step was to add a basic cost-control layer.
Even though this project was designed to stay very low cost, I still wanted to treat it like a real cloud deployment. In practice, that means not only building and deploying resources, but also watching spend and setting boundaries.
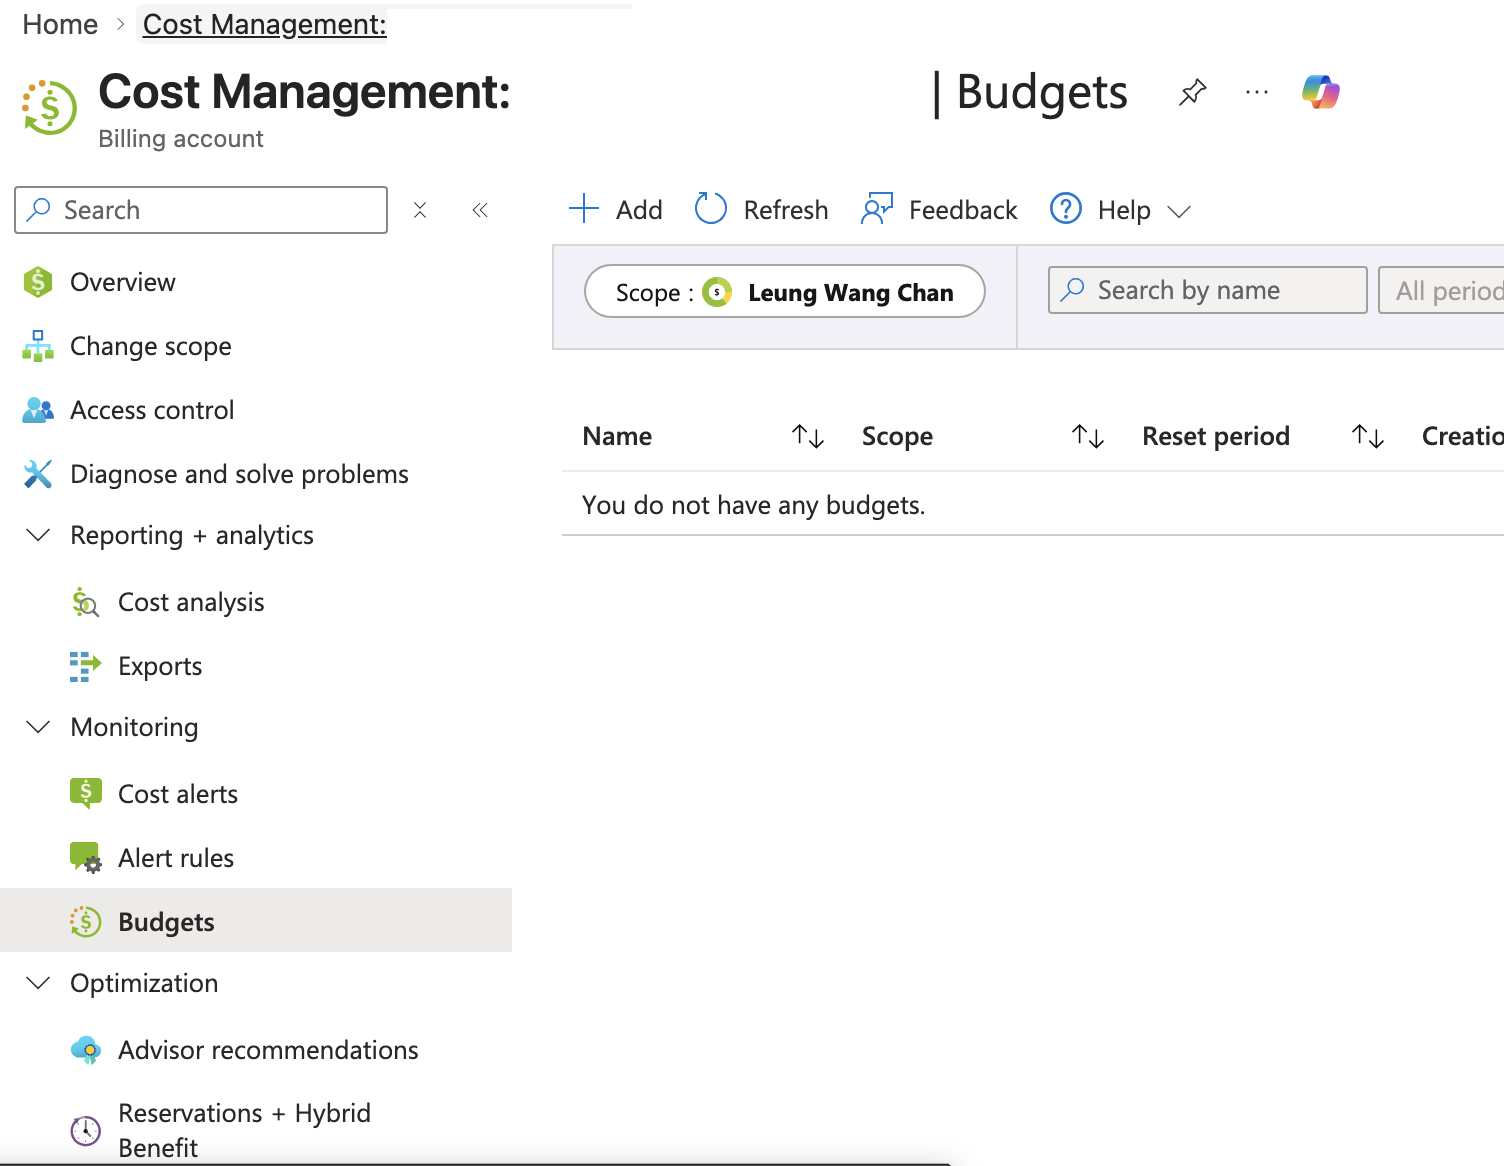
In this part, I created a budget in Azure Cost Management for the project resource group and configured alert conditions to help monitor cost growth.
This was a small step, but it added an important production-minded habit: do not wait until a bill appears before thinking about cost control.
Why I Added a Budget
A low-cost cloud project can still benefit from basic financial controls.
I added a budget for a few reasons:
- to build better cloud cost awareness
- to create a simple alerting layer for the project
- to limit surprises if resource usage changed unexpectedly
- to practice using Azure Cost Management in a real project
- to show that even a small deployment should have operational guardrails
This was especially relevant because the project already included multiple cloud-related components:
- Azure Static Web Apps
- Azure Functions integration
- custom domain work
- Cloudflare edge integration
Even though the actual spend was expected to remain very low, the budget added useful discipline.
Step 1 - Review Budget Scope Options
I first reviewed the Azure Cost Management budget area from two perspectives:
- billing account scope n- resource group scope
The billing account view showed the broader budget area for the account, while the resource group view gave me the more focused scope that I actually wanted for this project.
For this website, the resource group scope made more sense because I wanted the budget to track only the project resources rather than the entire billing account.
Step 2 - Choose the Resource Group Scope
Instead of setting a budget at the full billing account level, I moved into the project resource group budget page.
The resource group used for this setup was:
MyOwnServiceRG
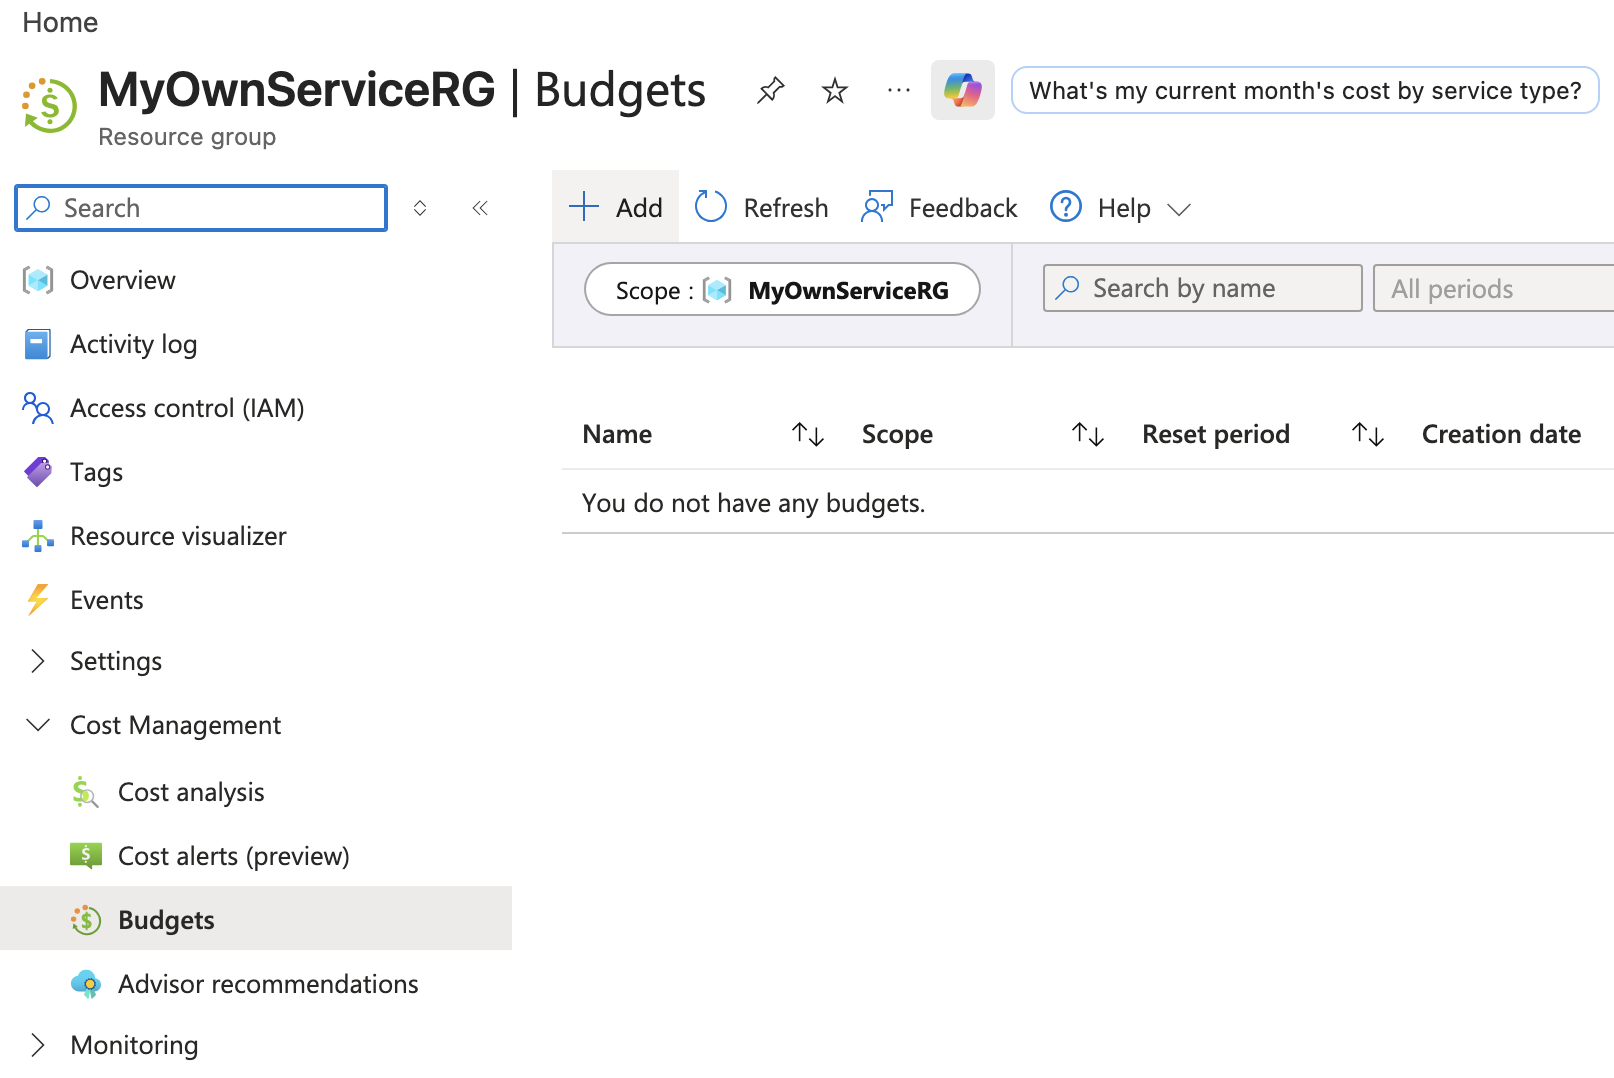
This was the cleaner and more practical choice because it narrowed the budget to the resources directly related to the project.
That also avoided unnecessary confusion from costs outside the website environment.
Step 3 - Start the Budget Creation Process
Inside the resource group budget page, I selected Add to create a new budget.
Azure then opened the Create budget flow.
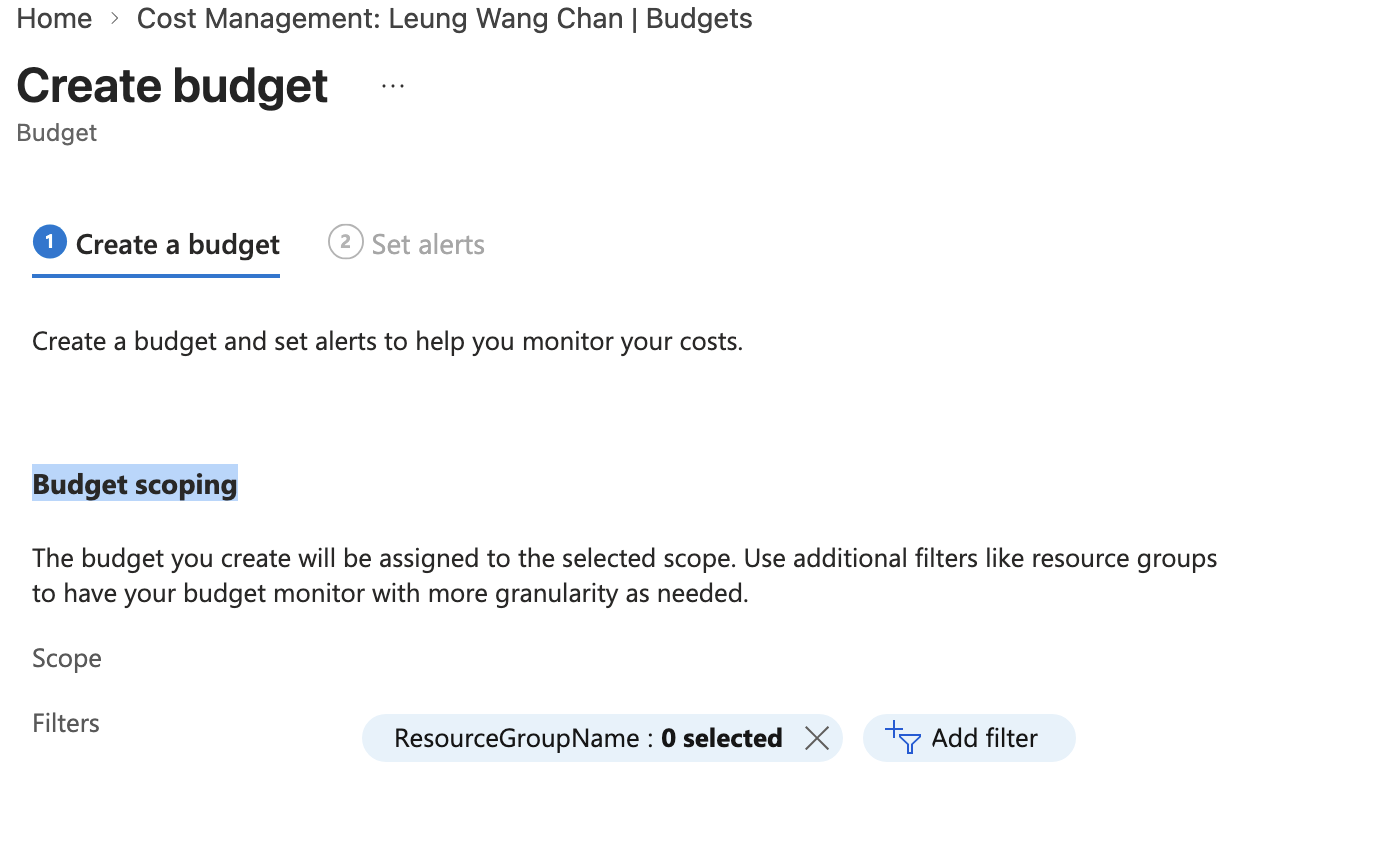
This screen made it clear that the budget would be assigned to the selected scope and could optionally use filters for more granularity.
At this stage, the important decision was already made: the budget would be attached to the project resource group rather than the broader billing account.
Step 4 - Define the Budget Details
I then filled in the basic budget details.
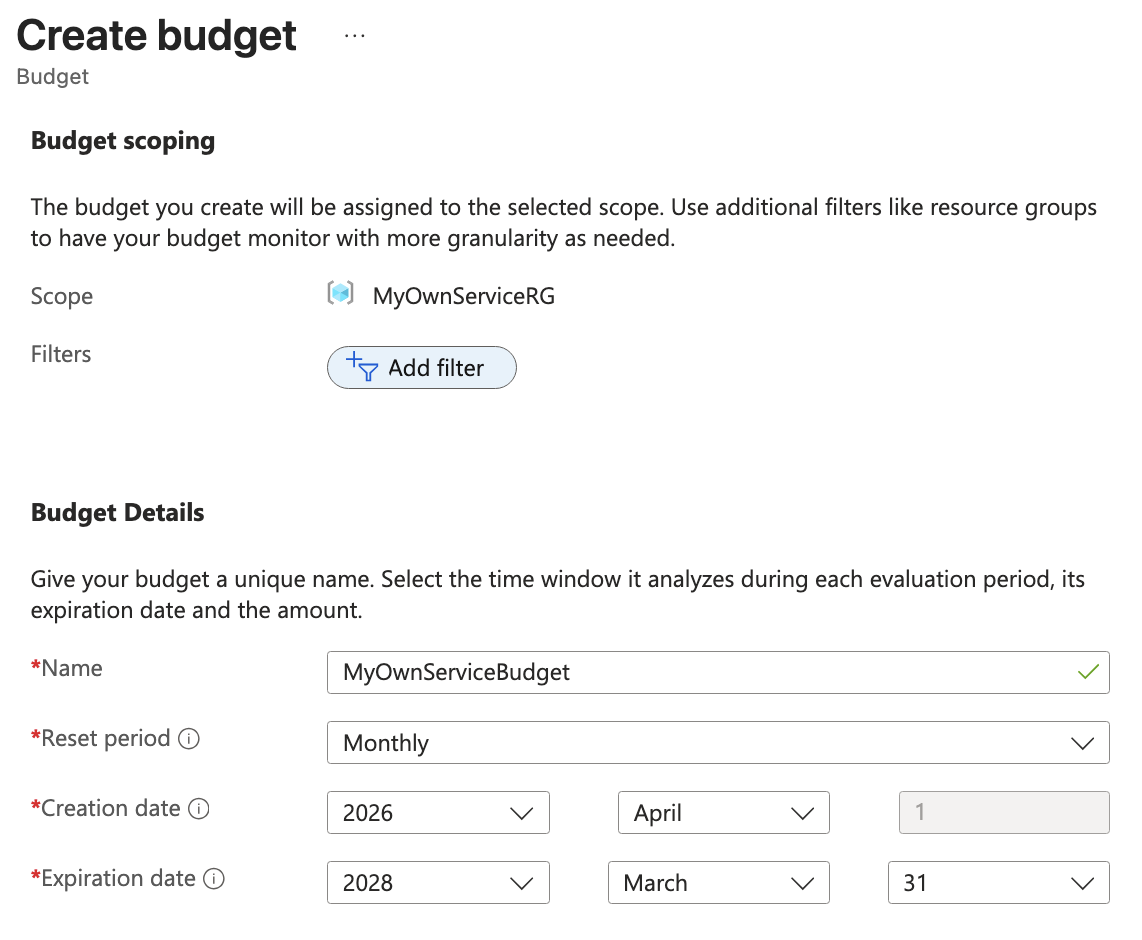
Scope
MyOwnServiceRG
Name
MyOwnServiceBudget
Reset period
Monthly
Creation date
2026-04-01
Expiration date
2028-03-31
This setup made the budget persistent enough for ongoing use while still keeping the project organized under a clear monthly evaluation cycle.
Step 5 - Set a Very Small Budget Amount
For the budget threshold, I entered:
0.01
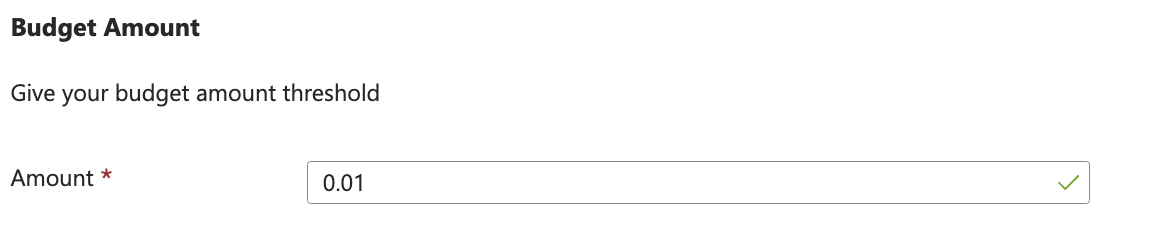
This was intentionally tiny.
The goal here was not to model realistic production spend. The goal was to create a highly sensitive alerting threshold for a project that should normally stay extremely cheap.
Because this website was designed around low-cost Azure services, using a very small budget amount made it easier to detect any unexpected cost activity early.
This also reflected a useful lab mindset: start with strong visibility, then adjust later if needed.
Step 6 - Review Action Group Concepts
During the alert setup process, Azure also exposed the option to use an action group.
This was useful to understand even if it was not the main purpose of the budget itself.
An action group in Azure is basically a reusable set of notification or action settings that can be triggered by an alert.
In practical terms, this means:
- the budget defines when to alert
- the action group defines what happens after the alert fires
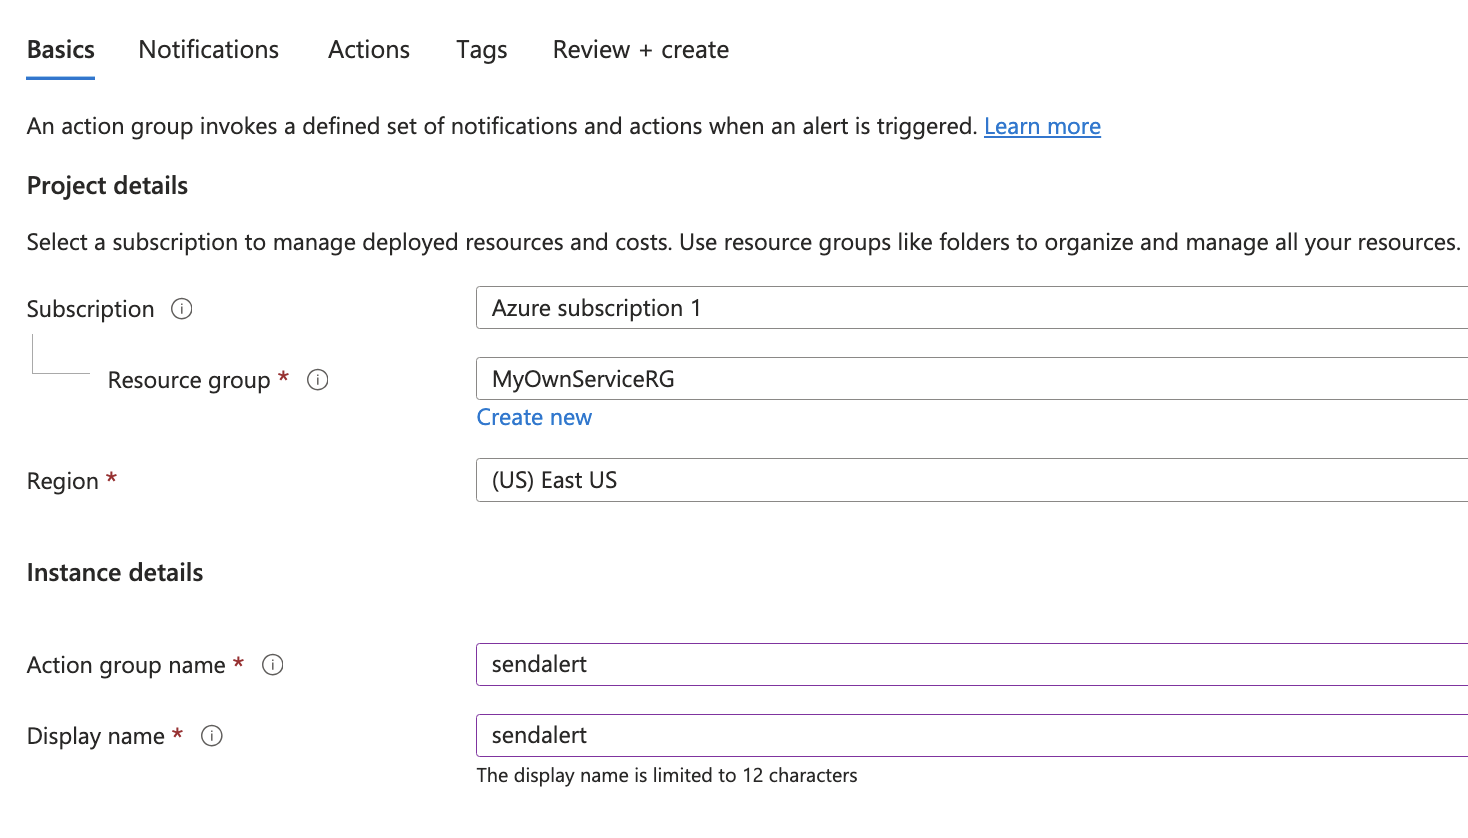
For this project, the main focus was simple alerting rather than advanced automation, but reviewing the action group flow still helped me understand the structure of Azure alerting more clearly.
Step 7 - Configure Alert Conditions
After defining the budget, I moved to the alert configuration step.
The alert conditions screen allowed me to set thresholds based on budget percentage.
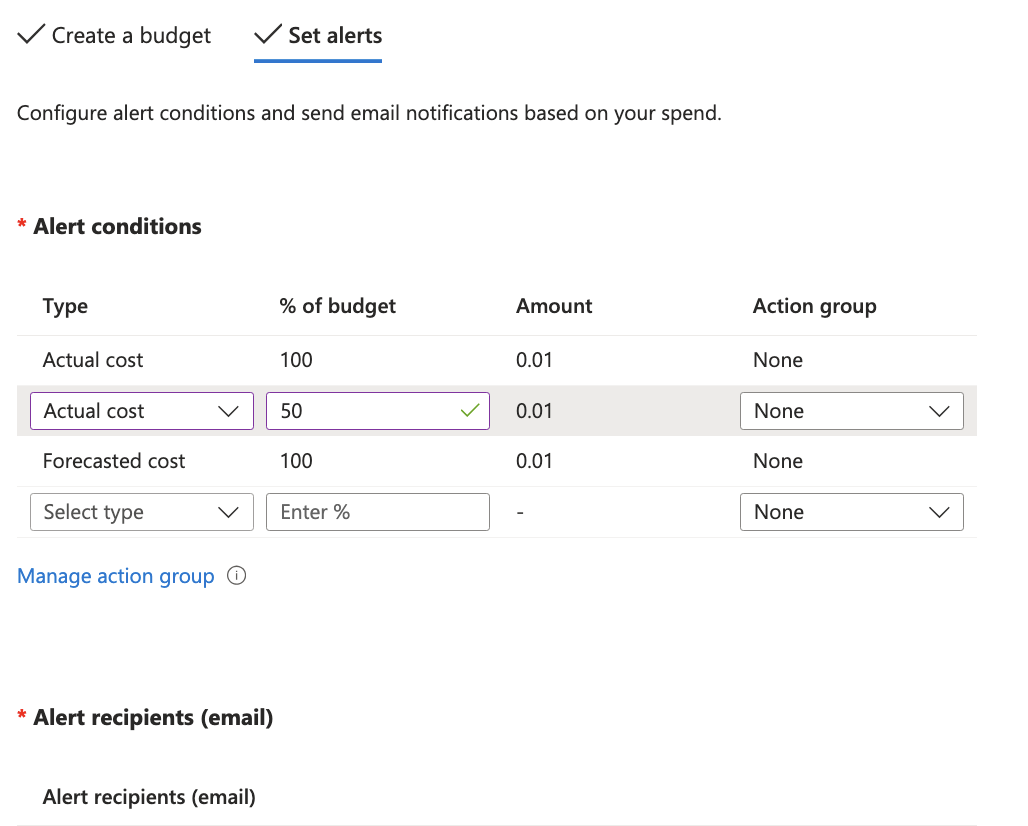
One of the configured entries used:
- Type: Actual cost
- % of budget: 50
- Amount: 0.01
This means the alerting process could begin before the budget was fully consumed.
Even though the budget amount itself was very small, the point of the exercise was to understand how Azure budgets and thresholds work in practice.
This also reinforced an important idea: cloud cost control is not only about large environments. The same habits should apply even in small deployments.
Step 8 - Understand Alert Recipients and Simplicity
The alert setup also included the option to specify alert recipients (email) and optionally connect an action group.
For this project, the main goal was basic visibility rather than a complex escalation workflow.
That kept the setup simple and aligned with the actual scale of the site:
- a small budget
- a simple alerting threshold
- a narrow resource group scope
- practical visibility without unnecessary complexity
This was enough to turn the project into something more operationally aware.
Step 9 - Create the Budget
After reviewing the details and alert settings, I completed the setup and created the budget.

Once created, the budget appeared under the resource group budget list with:
- the resource group scope
- monthly reset period
- creation date
- expiration date
- budget amount of
$0.01
At that point, the project had an actual Azure budget attached to it, not just a theoretical plan to monitor cost later.
Result
At the end of this stage, the project included a working Azure Cost Management budget tied to the project resource group.
The setup now included:
- resource group-scoped cost monitoring
- a named monthly budget
- a very small budget threshold for early visibility
- alert condition configuration
- exposure to Azure action group concepts
- a more production-minded operational setup
This did not change the website visually, but it improved the project from an operational and governance perspective.
What This Part Demonstrates
This part demonstrates:
- using Azure Cost Management in a real project
- thinking about cost before problems appear
- applying a budget at resource group scope
- understanding budget thresholds and alert conditions
- basic familiarity with Azure alerting structure
- operational discipline beyond deployment alone
What I Learned
A few practical lessons stood out from this stage:
- Budget scope matters, and resource group scope is often cleaner for small projects
- A tiny budget can still be useful as an alerting exercise
- Azure separates budget definition from alerting actions in a logical way
- Operational thinking includes cost control, not only deployment success
- Even a low-cost portfolio site benefits from basic governance habits
Final Reflection
This stage was small, but valuable.
By adding a budget, the project moved one step further away from being only a technical demo and closer to being a managed cloud workload.
The website already demonstrated hosting, serverless integration, custom domain setup, HTTPS, and Cloudflare integration. Adding Azure budget monitoring extended that story into cost awareness and basic operational control.
That made the project more complete from a cloud engineering perspe