Project 1 - Part 4 - DNS Setup with Azure Static Web Apps and Cloudflare
Project 1 - Part 4 - DNS Setup with Azure Static Web Apps and Cloudflare
Overview
After the website and API were working, the next step was to connect the site to a real public hostname and handle DNS properly.
In this part, I configured DNS records in Cloudflare, added the custom domain in Azure Static Web Apps, completed validation, and then moved the live hostname behind Cloudflare proxying.
This was one of the most practical parts of the project because it turned the site from a default Azure-generated endpoint into a real public domain with cleaner routing and a more realistic deployment path.
Why This Step Mattered
Using the default Azure Static Web Apps hostname is useful for initial deployment, but it does not feel like a finished public-facing setup.
Adding DNS work to the project was valuable because it introduced several real operational concerns:
- Mapping a real hostname to a cloud-hosted service
- Configuring DNS records in Cloudflare
- Validating a custom domain in Azure Static Web Apps
- Understanding when to use DNS only versus Proxied
- Starting with the simpler www hostname before handling the root domain
- Preparing the site for later Cloudflare edge, SSL/TLS, caching, and redirect configuration
For a cloud portfolio project, DNS work adds important realism. It shows that the project is not only about writing website content, but also about understanding how public cloud hosting, DNS, and domain validation work together.
Step 1 - Open Cloudflare DNS Records
I managed the domain in Cloudflare and started from the DNS records page for the domain:
lwcsecinfra.com
From Cloudflare, I went to DNS, then Records.
This is where DNS records can be reviewed, added, edited, and removed.
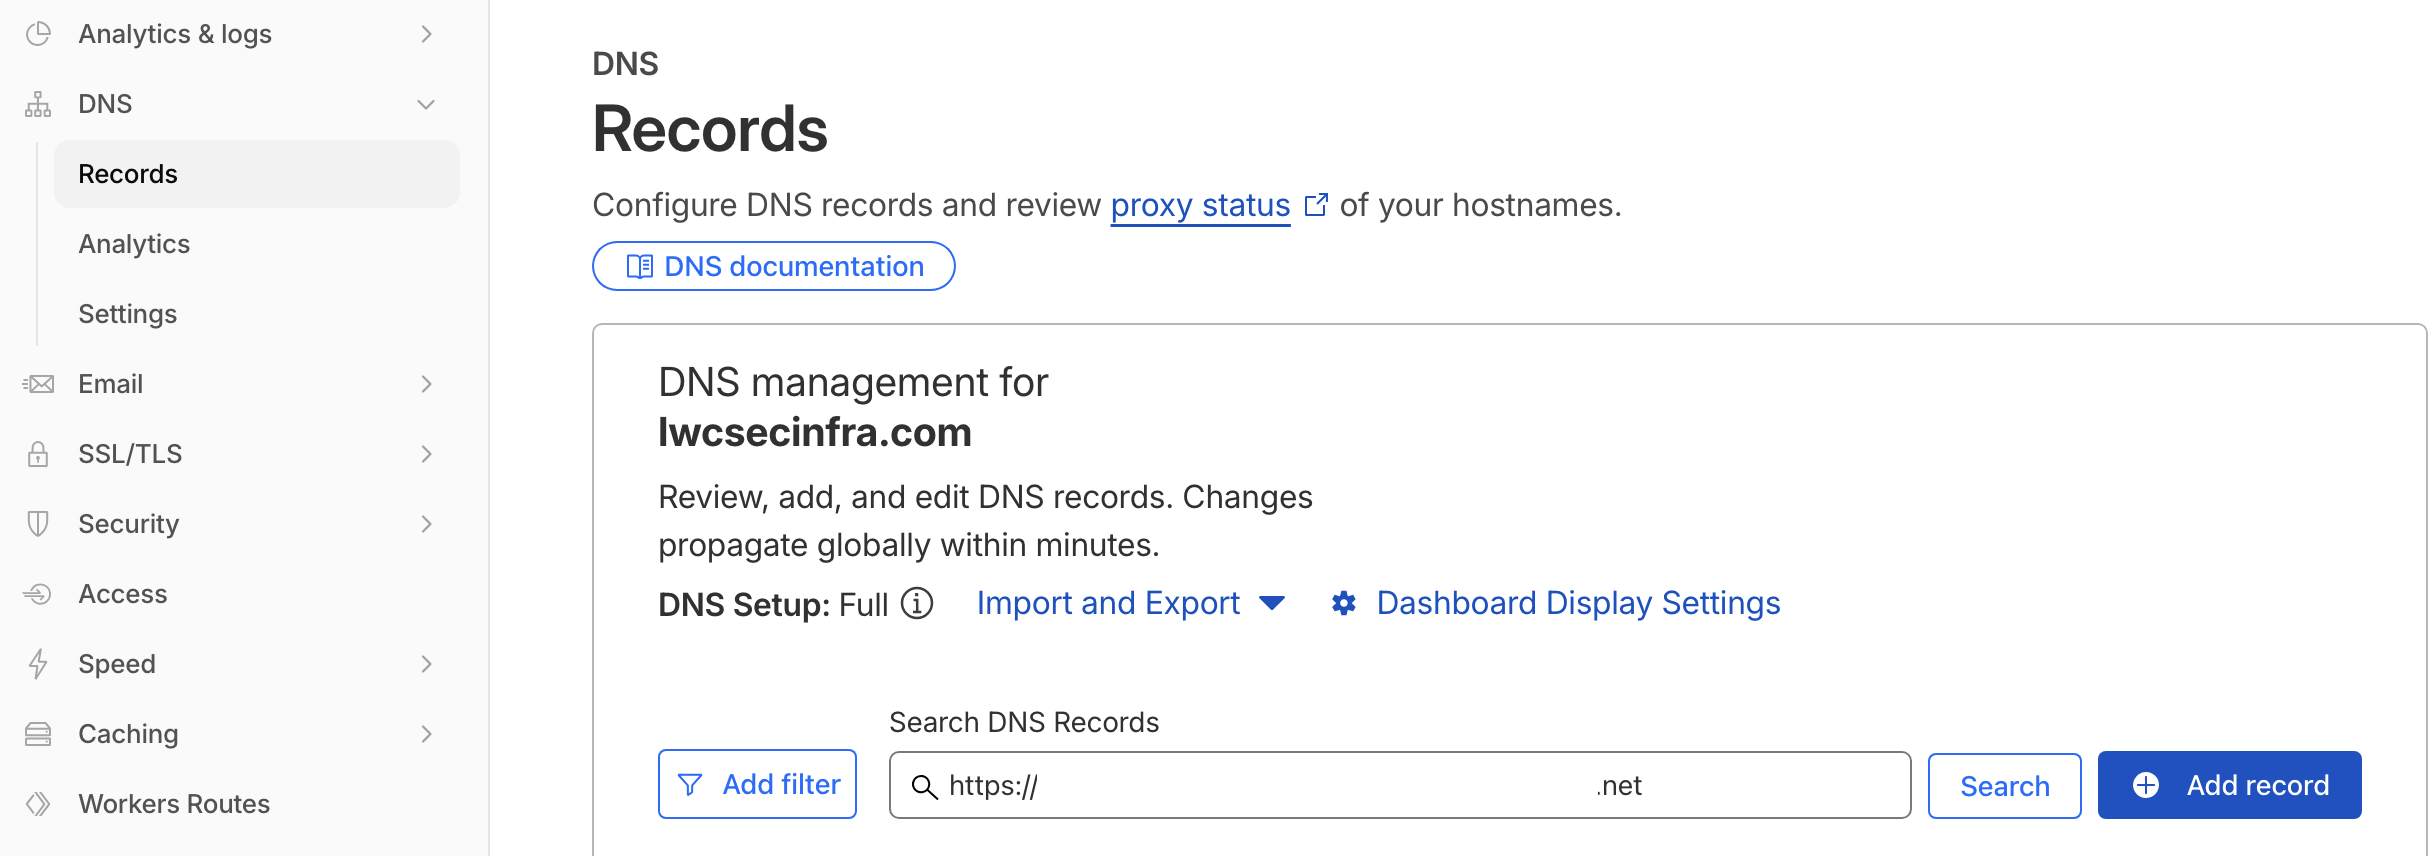
The goal of this step was to prepare a hostname mapping from my custom domain to the Azure Static Web Apps default hostname.
Step 2 - Add a CNAME Record for www
I started with the www hostname instead of the root domain.
This was intentional because www is a normal subdomain and works cleanly with a CNAME record.
In Cloudflare, I created a new DNS record with the following structure:

- Type: CNAME
- Name: www
- Target: Azure Static Web Apps default hostname
- Proxy status: DNS only
At this stage, the important decision was to keep the record on DNS only.
That was deliberate. I wanted Azure Static Web Apps to complete domain validation cleanly before introducing Cloudflare proxying into the traffic path.
Using DNS only first made the setup easier to troubleshoot because Azure could directly resolve the CNAME target during validation.
Step 3 - Add the Custom Domain in Azure Static Web Apps
After preparing the DNS record in Cloudflare, I went back to Azure.
Inside the Azure portal, I opened my Static Web App and went to Custom domains, then Add.
Then I entered the custom domain:
www.lwcsecinfra.com
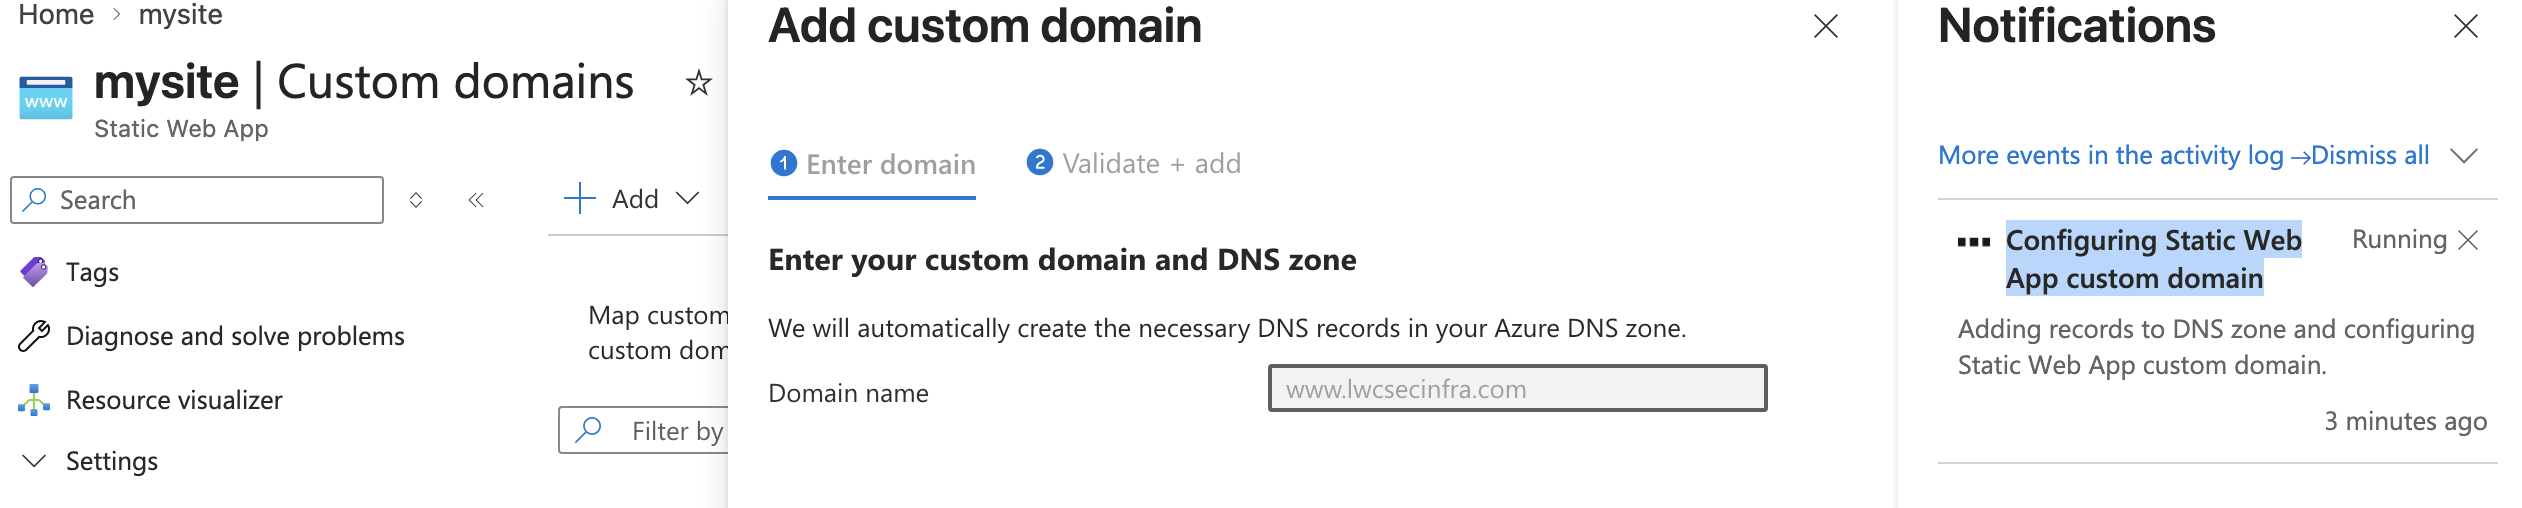
At this point, Azure started the process of validating the custom domain and configuring it for the Static Web App.
The notification panel showed that Azure was working on the custom domain configuration.
Step 4 - Wait for Validation and Configuration
Domain configuration is not always instant(around 15mins).
Even when the DNS record is correct, Azure may need a short amount of time to validate the hostname and attach it to the Static Web App.
During this step, Azure showed that the Static Web App custom domain configuration was running.
This reinforced an important DNS lesson:
After changing DNS or adding a custom domain, verify the current status before changing more settings.
Changing too many things too quickly can make troubleshooting harder.
Step 5 - Confirm the Domain Is Validated in Azure
After the setup completed, Azure Static Web Apps showed the custom domain entry in the Custom domains list.
The important result was:
www.lwcsecinfra.com
The status changed to:
Validated
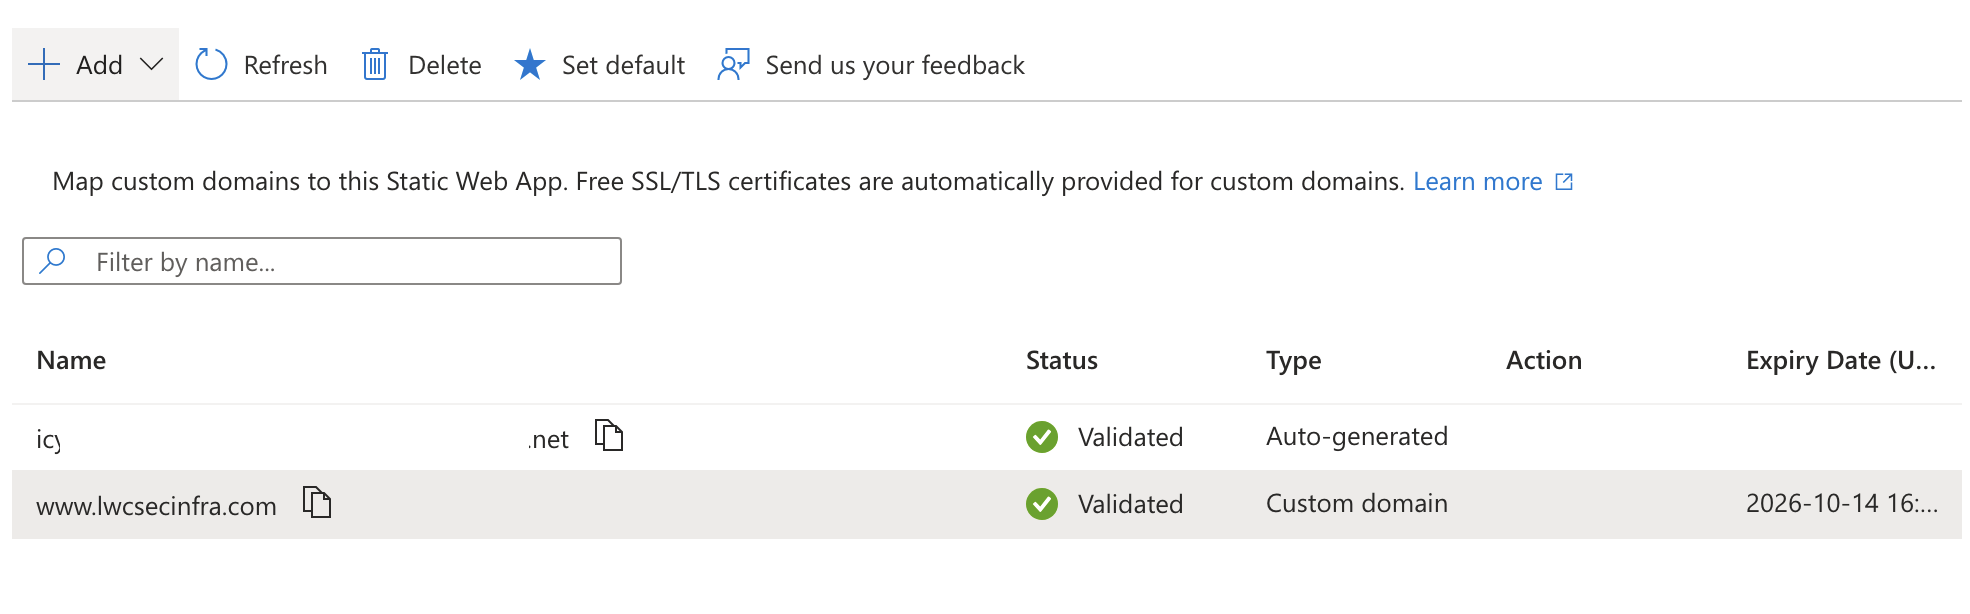
This confirmed that:
- The Cloudflare DNS record was correct
- Azure accepted the hostname
- The custom domain was attached to the Static Web App
- The site was no longer only reachable through the default Azure-generated hostname
At this point, the domain validation step was complete.
Step 6 - Return to Cloudflare and Review the www Record
After Azure validated the custom domain, I returned to Cloudflare and reviewed the www DNS record.
At this stage, the record existed as:
- Type: CNAME
- Name: www
- Target: Azure Static Web Apps default hostname
- Proxy status before validation: DNS only
- Proxy status after validation: Proxied
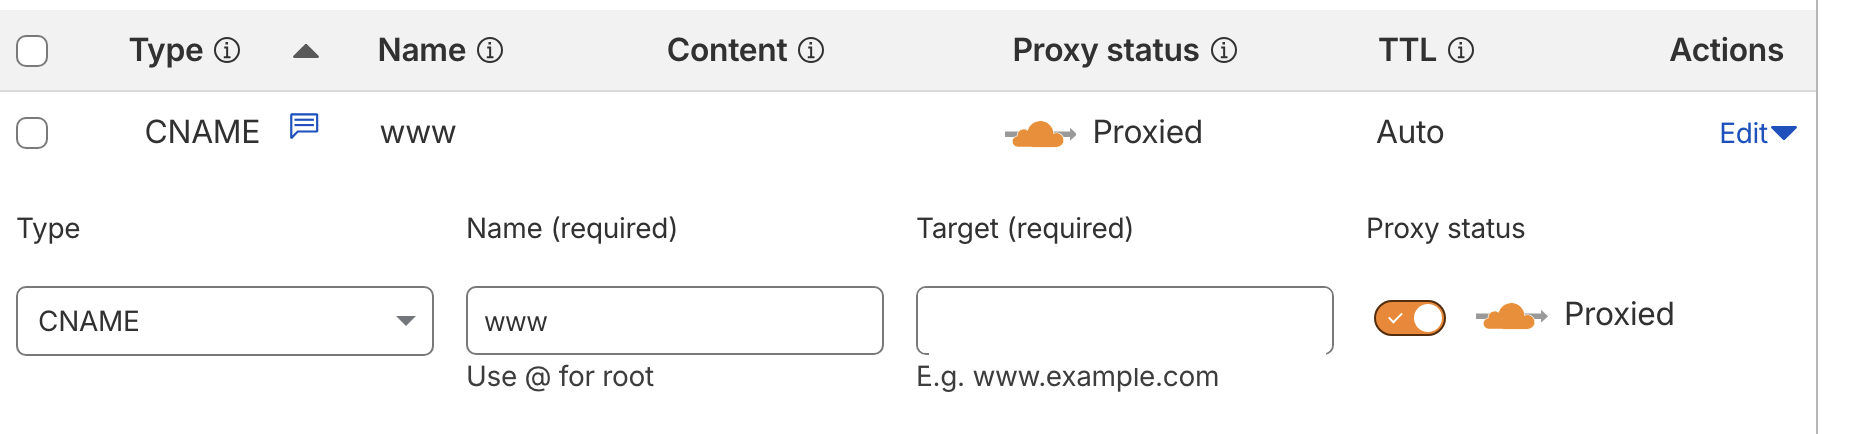
This changed Cloudflare from only being the DNS provider into becoming part of the live traffic path.
Step 7 - Why I Switched from DNS Only to Proxied
I did not enable Cloudflare proxying immediately because domain validation was the first priority.
The workflow I followed was:
- Cloudflare DNS only
- Azure Static Web Apps validation
- Confirm domain is validated
- Switch Cloudflare record to Proxied
This order helped separate two different tasks:
- Domain validation
- Live traffic handling
Starting with DNS only reduced the chance of validation issues.
After Azure successfully validated the domain, switching the www record to Proxied made more sense because it allowed the site to benefit from Cloudflare features.
This gave the project:
- Cloudflare edge traffic handling
- Cloudflare analytics visibility
- Cloudflare security and performance options
- Support for later SSL/TLS and redirect configuration
- A more production-style public DNS setup
Important Note About www vs Root Domain
In this part, I used:
www.lwcsecinfra.com
instead of the root domain:
lwcsecinfra.com
This was a simpler starting point because www can be mapped with a normal CNAME record.
Root domain setup can require additional handling, such as CNAME flattening or other provider-specific behavior.
For this stage, focusing on www kept the workflow cleaner:
www.lwcsecinfra.com points to the Azure Static Web Apps hostname.
The root domain can be handled later with redirects or additional DNS configuration.
Result
At the end of this stage, the site had:
- A working custom domain in Azure Static Web Apps
- A validated www.lwcsecinfra.com hostname
- A proper CNAME record in Cloudflare
- A clean transition from DNS only validation to Proxied traffic
- A stronger foundation for HTTPS, redirects, caching, and edge security
This made the website much more realistic as a public cloud project.
Instead of only deploying a static site, I also configured the DNS layer that connects a real domain to the cloud-hosted application.
What This Part Demonstrates
This part demonstrates:
- Practical DNS configuration in Cloudflare
- Custom domain setup in Azure Static Web Apps
- Understanding of CNAME records
- Understanding the difference between DNS only and Proxied
- Staged domain validation workflow
- Controlled rollout of a live hostname
- Public cloud hosting architecture beyond the default Azure URL
This is important because real cloud projects usually require more than just deploying resources. They also require correct DNS, routing, validation, and traffic management.
Final Reflection
This stage was one of the clearest examples of moving from a lab-style deployment into something closer to a production-facing site.
By the end of the process, the website was no longer just an Azure-hosted demo on a generated hostname. It was reachable through a real public domain, validated in Azure Static Web Apps, and managed through Cloudflare DNS.
The most important lesson was that DNS setup should be done in a controlled order.
First, I used Cloudflare in DNS only mode so Azure could validate the domain cleanly. After validation succeeded, I switched the www record to Proxied so Cloudflare could handle live traffic.
That gave me a cleaner, more realistic hosting setup and a stronger foundation for later improvements such as SSL/TLS settings, redirects, caching, and security controls.