Project 1 - Part 5 - Cloudflare Security and Edge Protection
Project 1 - Part 5 - Cloudflare Security and Edge Protection
Overview
After the custom domain and DNS setup were working, the next step was to improve the public-facing security posture of the site.
In this part, I configured a practical set of Cloudflare security and edge settings for the website. The goal was not to turn a small portfolio site into an enterprise security stack. The goal was to apply sensible controls that matched the scale of the project while still reflecting better production habits.
This stage included:
- setting Cloudflare SSL/TLS mode correctly
- forcing HTTP traffic to HTTPS
- reviewing redirect and rules areas
- enabling bot-related protection
- creating custom security rules
- adding API rate limiting for the site’s public endpoint
- observing traffic and request behavior through Cloudflare analytics
Why This Step Mattered
Once the website became publicly reachable on a real domain, it immediately moved into a different environment.
A public website does not stay “quiet” for long. Even a small site can start receiving:
- automated scans
- bots
- crawlers
- repeated requests against exposed paths
- traffic from cloud providers and overseas regions
That meant the project needed more than deployment and DNS. It also needed a basic edge security layer.
Cloudflare was already handling DNS and proxying, so it made sense to use it as the first line of security control.
Step 1 - Set SSL/TLS Mode to Full (strict)
One of the first important settings was Cloudflare SSL/TLS mode.
I selected:
Full (strict)
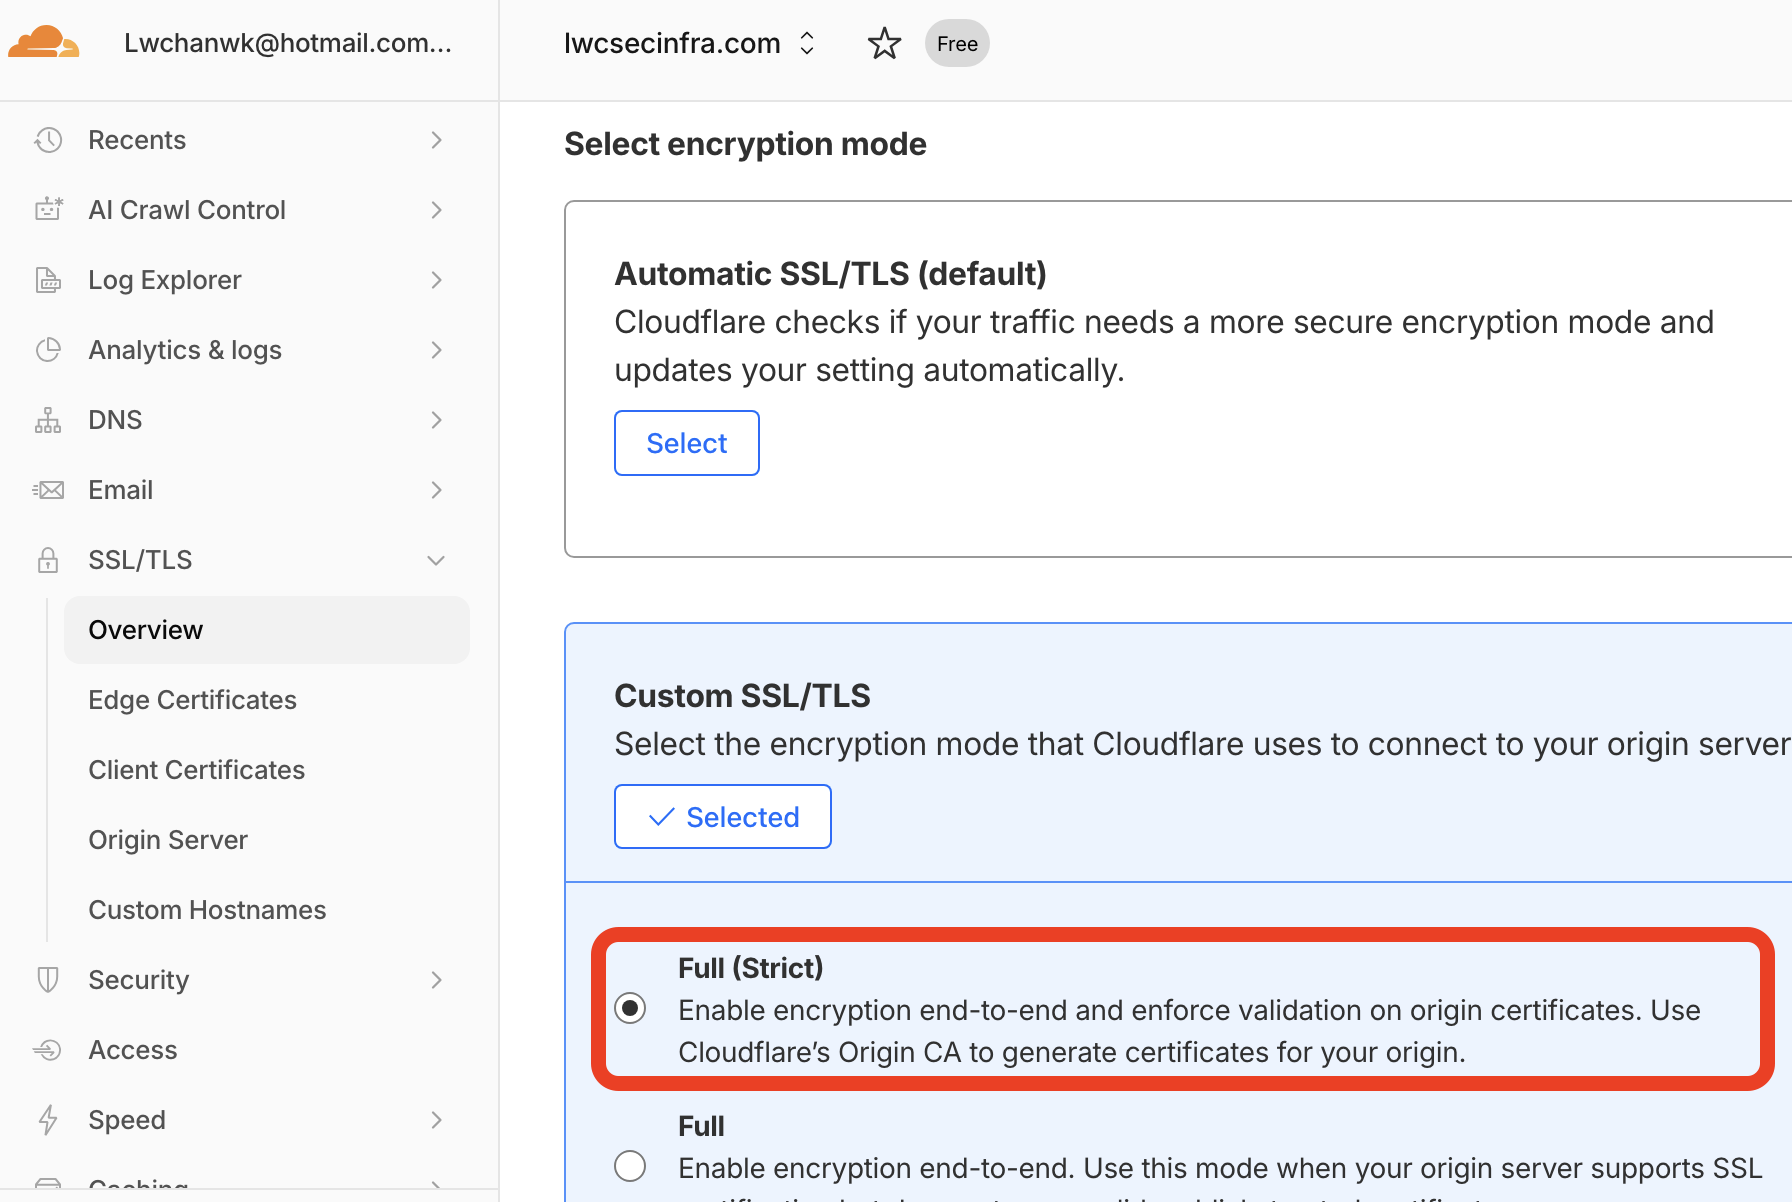
This was the correct choice for the project because Azure Static Web Apps already provided a valid HTTPS configuration for the custom domain.
Using Full (strict) meant:
- encryption stayed end-to-end
- Cloudflare validated the origin certificate properly
- the HTTPS path was stronger than a loose or fallback mode
This was one of the most important trust and transport-layer settings in the whole Cloudflare setup.
Step 2 - Enable Always Use HTTPS
After confirming that HTTPS was already working correctly, I enabled Always Use HTTPS in Cloudflare.
That setting forced all HTTP requests to redirect to HTTPS.
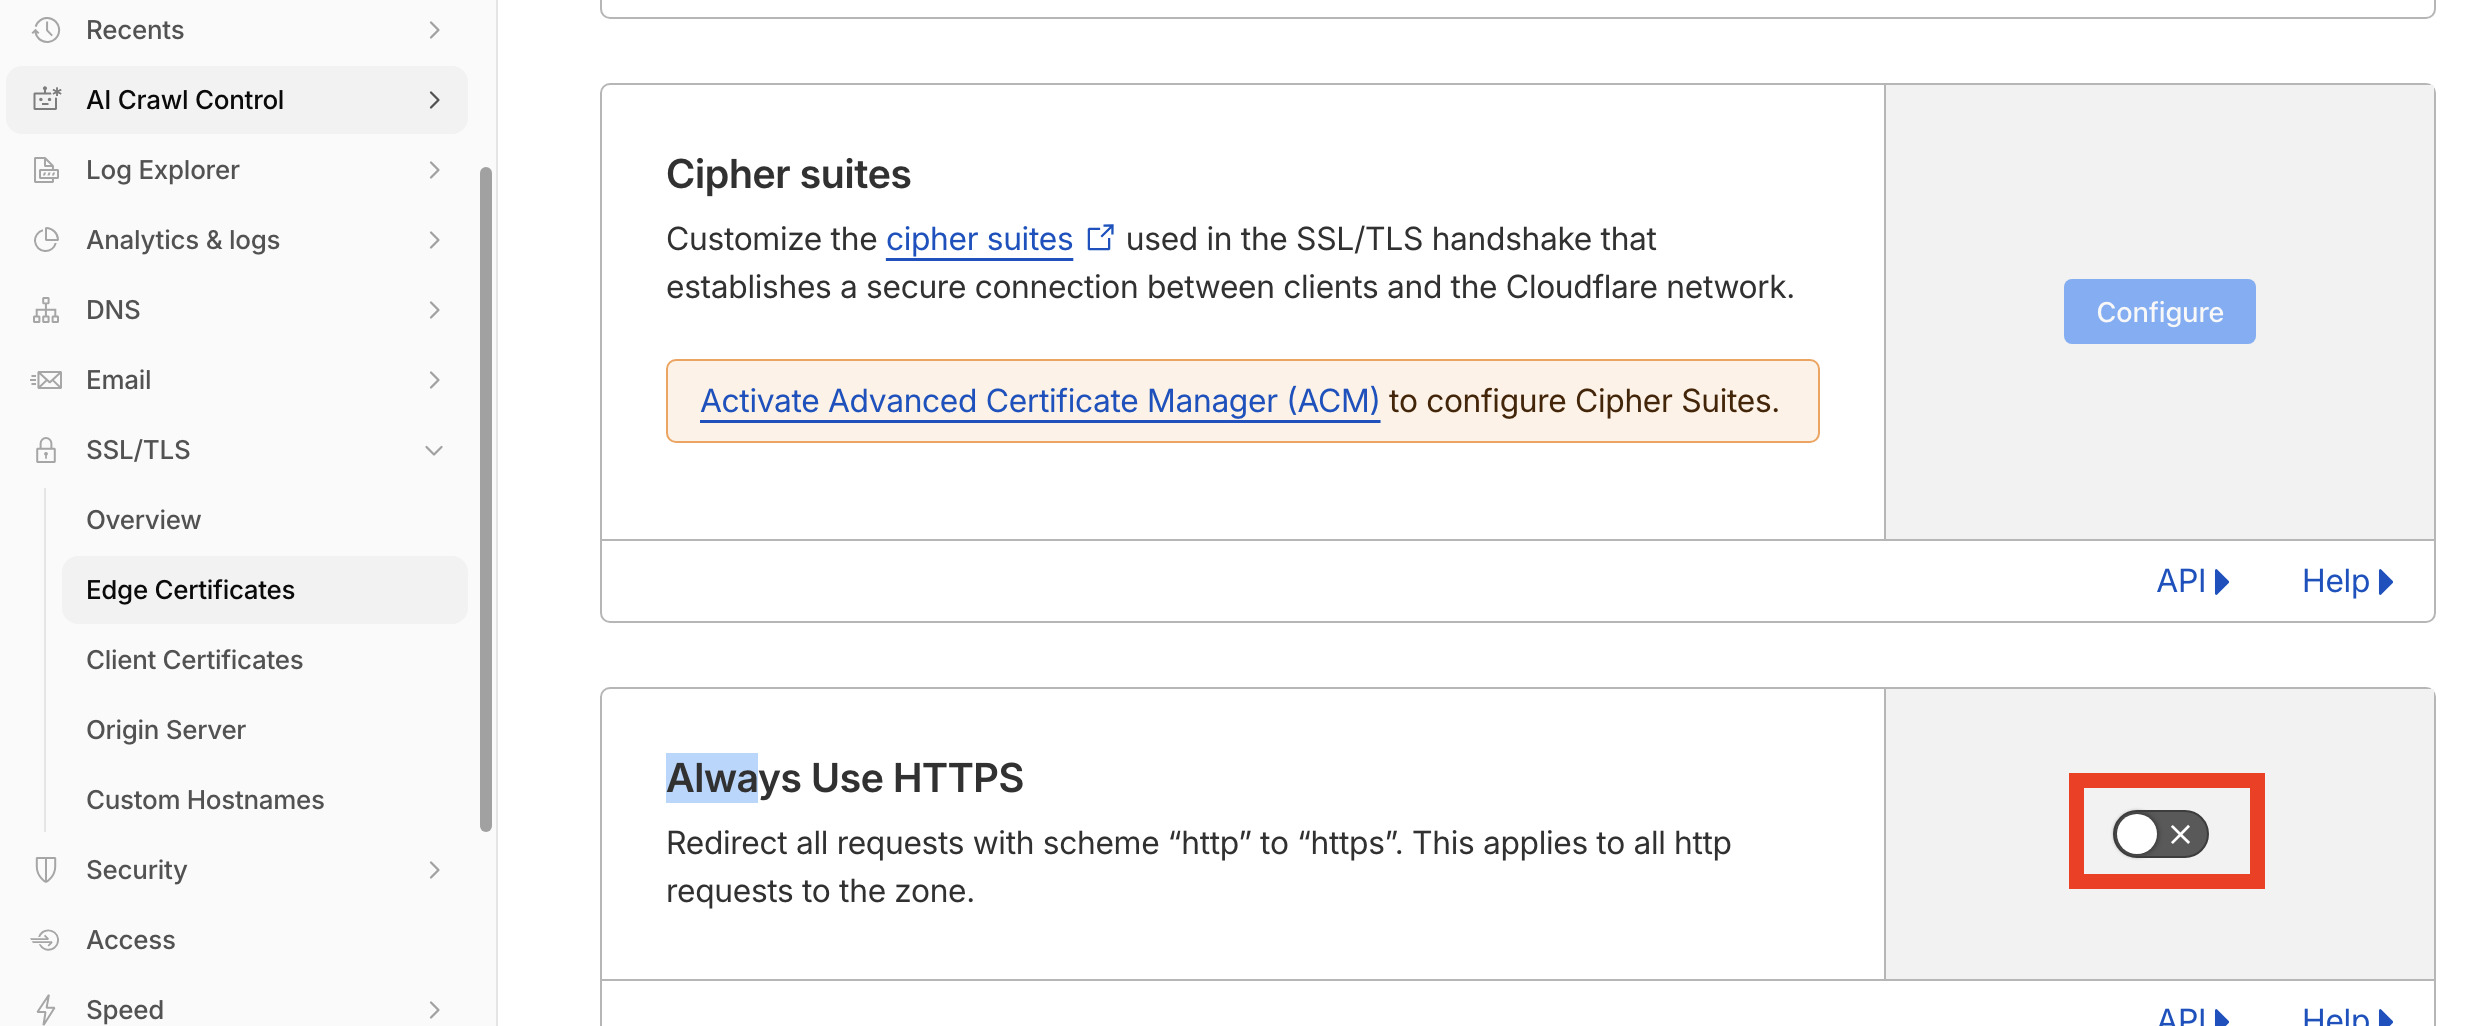
In practical terms, this cleaned up the public behavior of the site:
- visitors would land on the secure version automatically
- accidental HTTP requests would not stay on an insecure path
- the custom domain behaved more like a finished production site
This was a simple setting, but it improved the site immediately.
Step 3 - Review the Rules Area for Redirect and Traffic Control
I also reviewed the Cloudflare Rules area, which is where request modification, redirect logic, and related behavior can be managed.
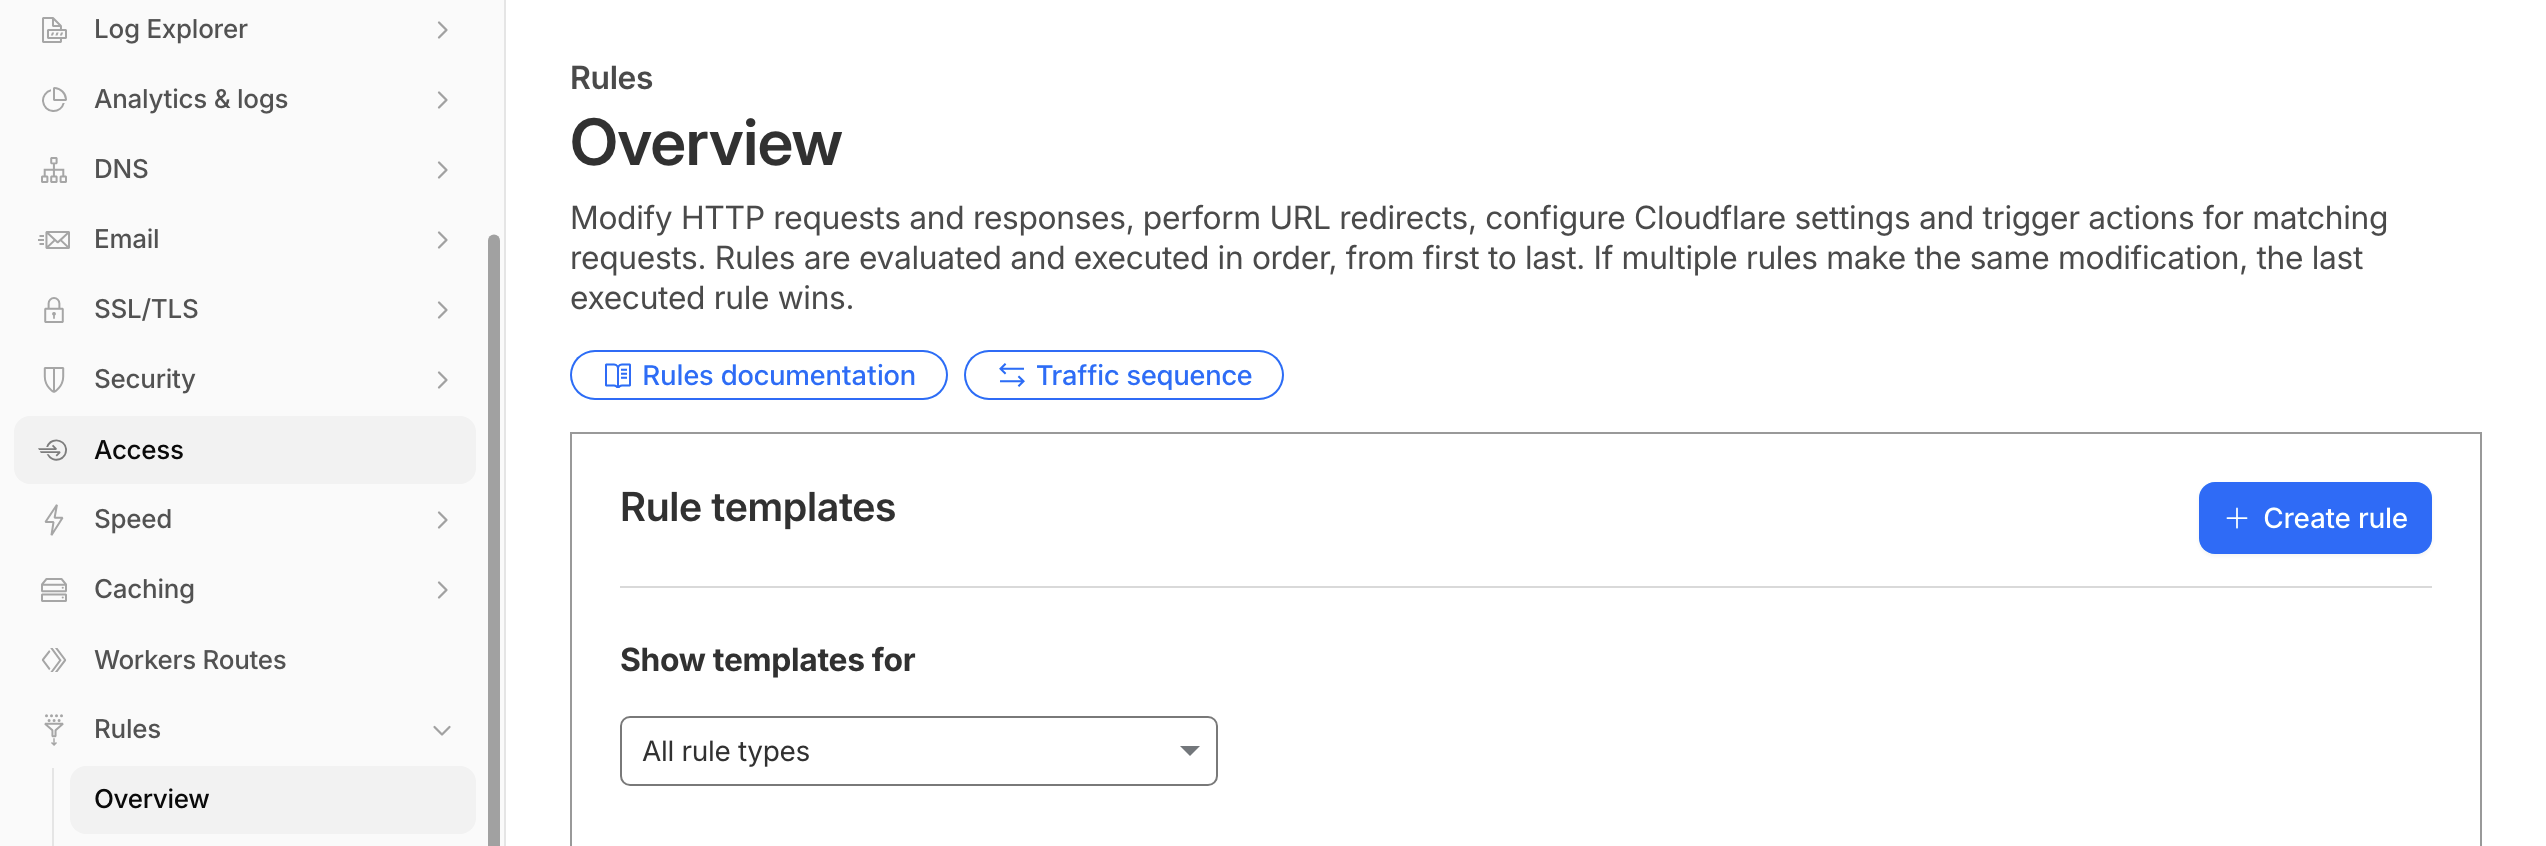
This mattered because the site did not just need DNS resolution. It also needed:
- controlled routing behavior
- redirect support
- a place for future rule-based traffic handling
The Rules section became an important part of the project because it connected site operations, user routing, and security behavior in one place.
Step 4 - Enable Bot Fight Mode
After the domain was live and traffic started reaching the site through Cloudflare, I enabled Bot Fight Mode.
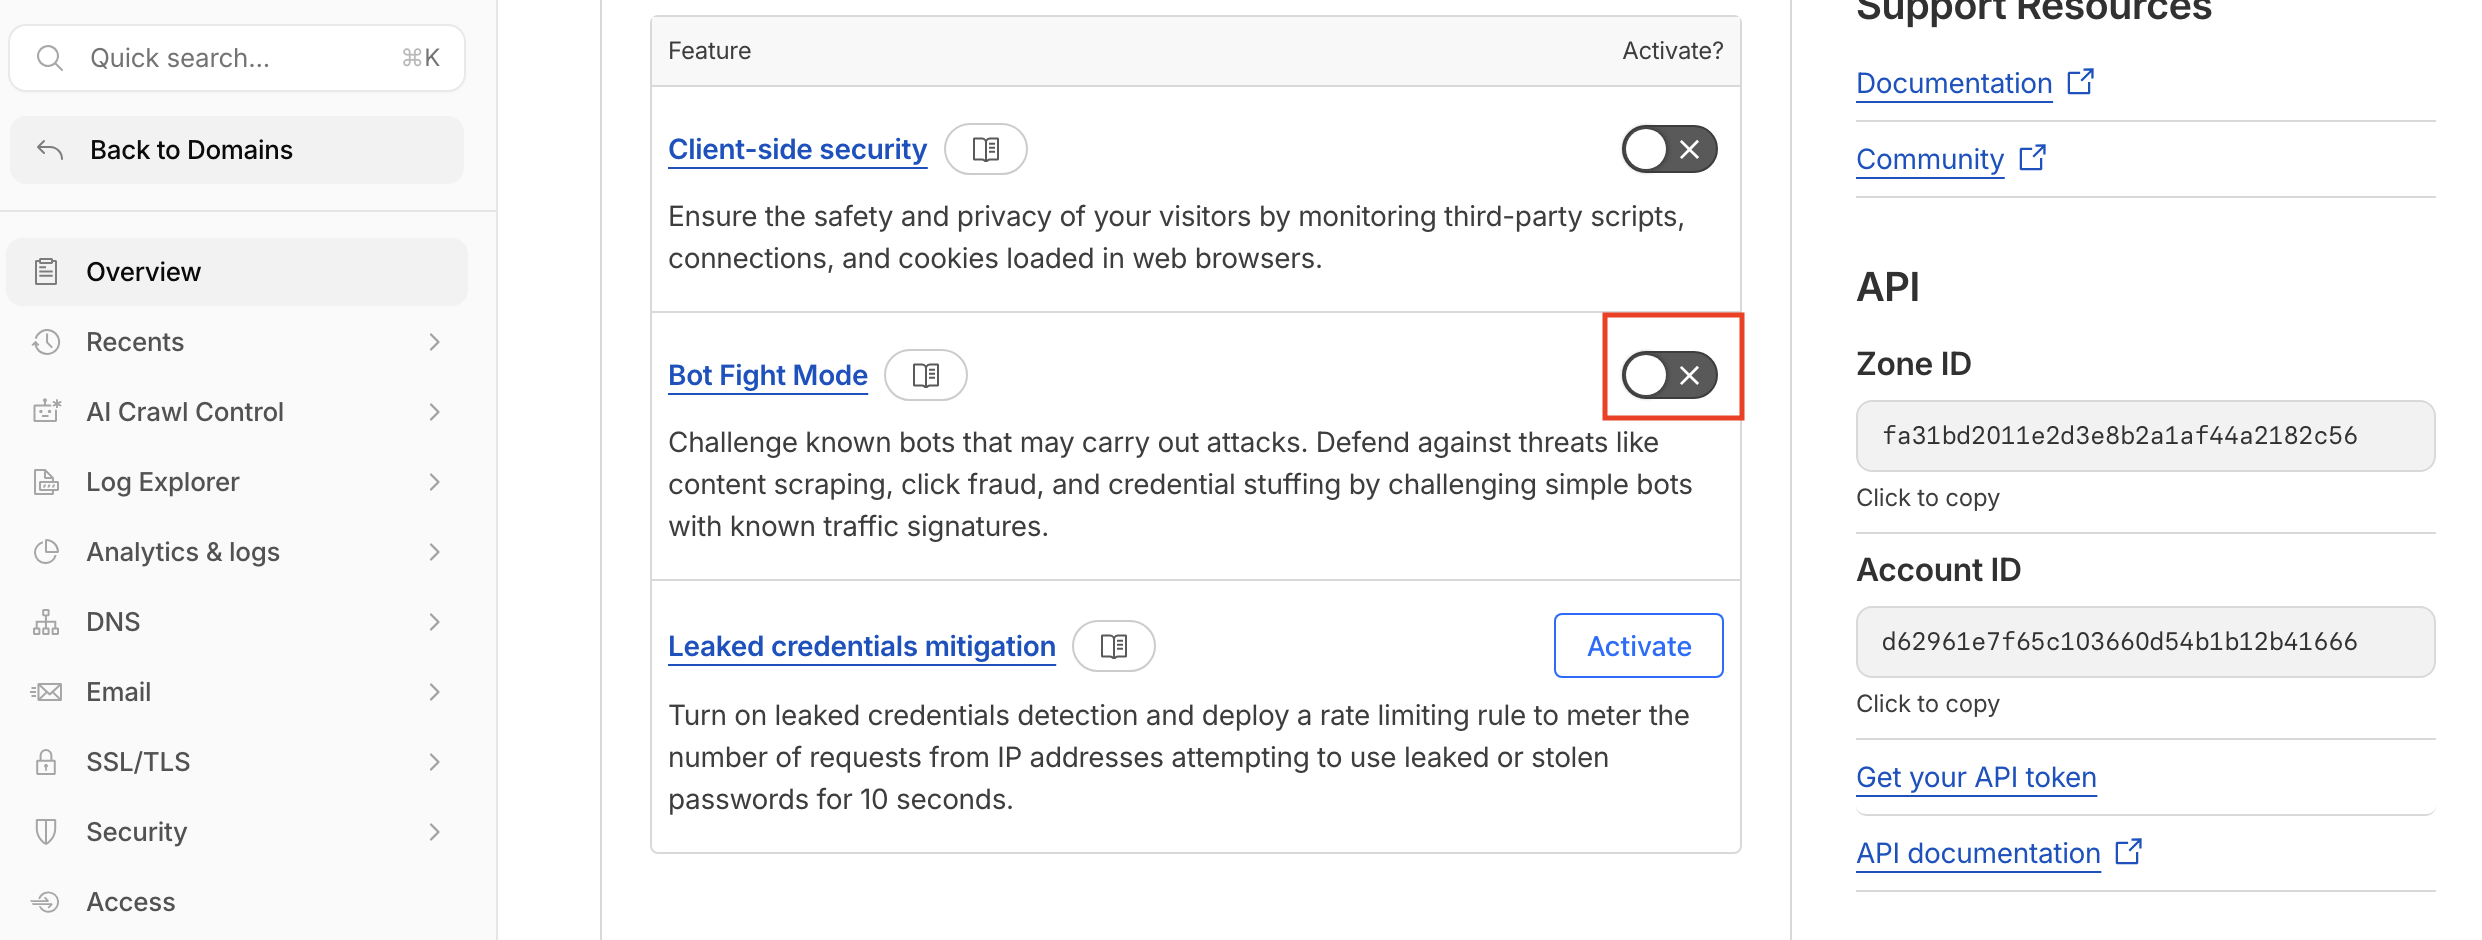
This was a good fit for the project because the site had already started seeing traffic patterns that clearly were not just normal visitors.
The point of Bot Fight Mode here was not to eliminate all automated traffic. It was to add a basic defensive layer against simpler bots and noisy request patterns without introducing too much complexity.
This matched the size of the project well:
- simple to enable
- useful for public traffic
- lightweight compared with more advanced enterprise controls
Step 5 - Add Custom Security Rules
After the baseline settings were in place, I moved into Cloudflare’s Security rules area.
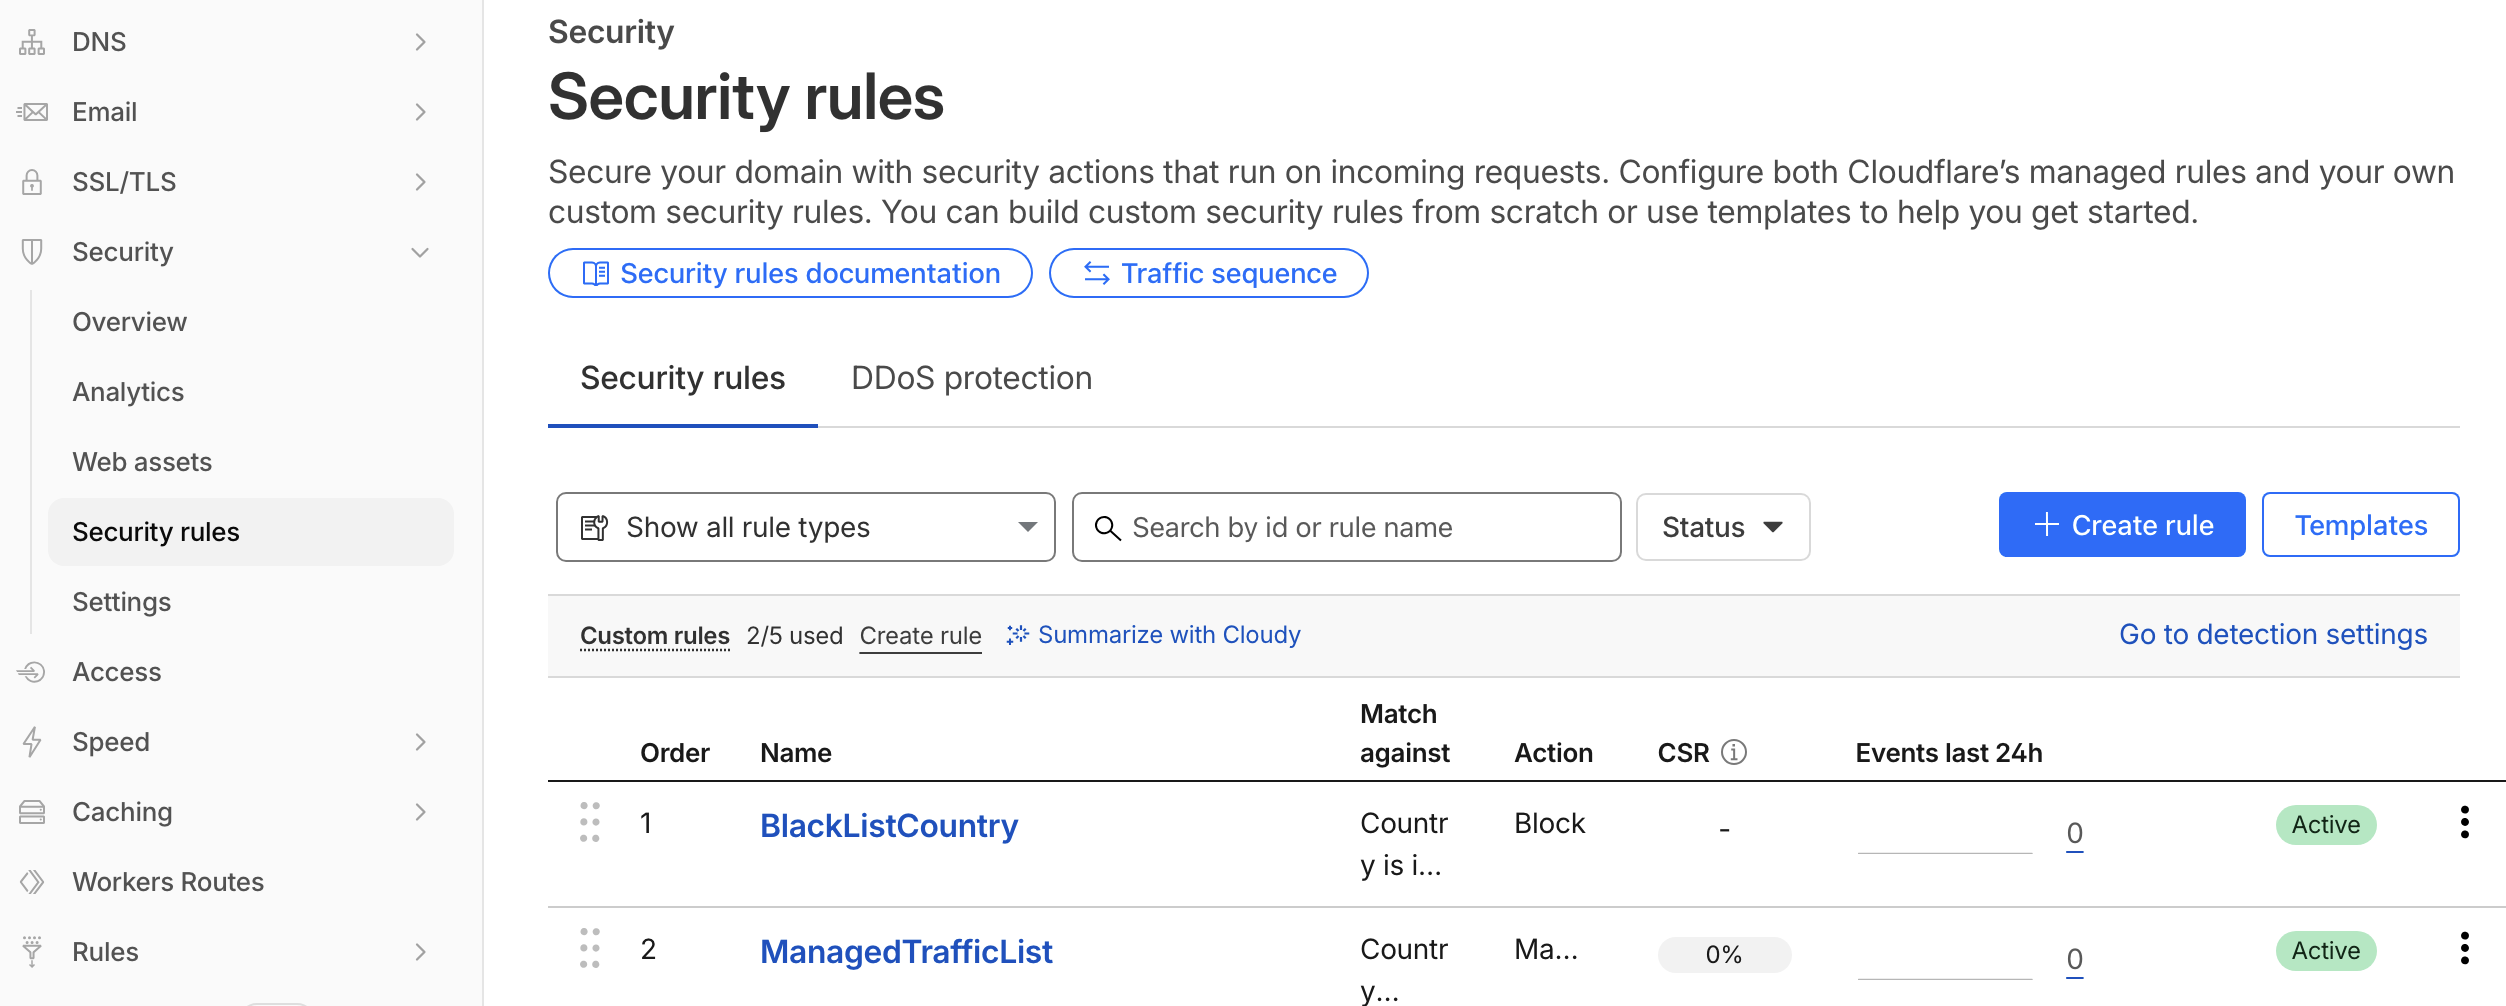
This was the part of the setup where the project shifted from generic settings to more explicit traffic control.
I created custom rules to handle unwanted traffic patterns more directly.
The screenshots show two active custom rules in the security rules list:
BlackListCountryManagedTrafficList
This added a more deliberate policy layer on top of the general Cloudflare defaults.
Instead of relying only on passive settings, the site now had explicit traffic rules that reflected real decisions about what should or should not be allowed.
Step 6 - Create a Rate Limiting Rule for the API Path
Because the project included a public API path, I also wanted to add a simple limit to stop low-value repeated calls.
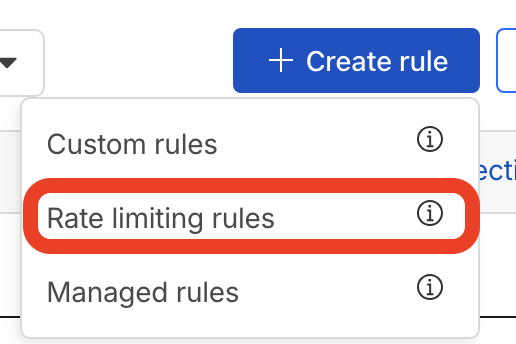
For that, I created a Rate limiting rule.
The rule focused on:
/api/*
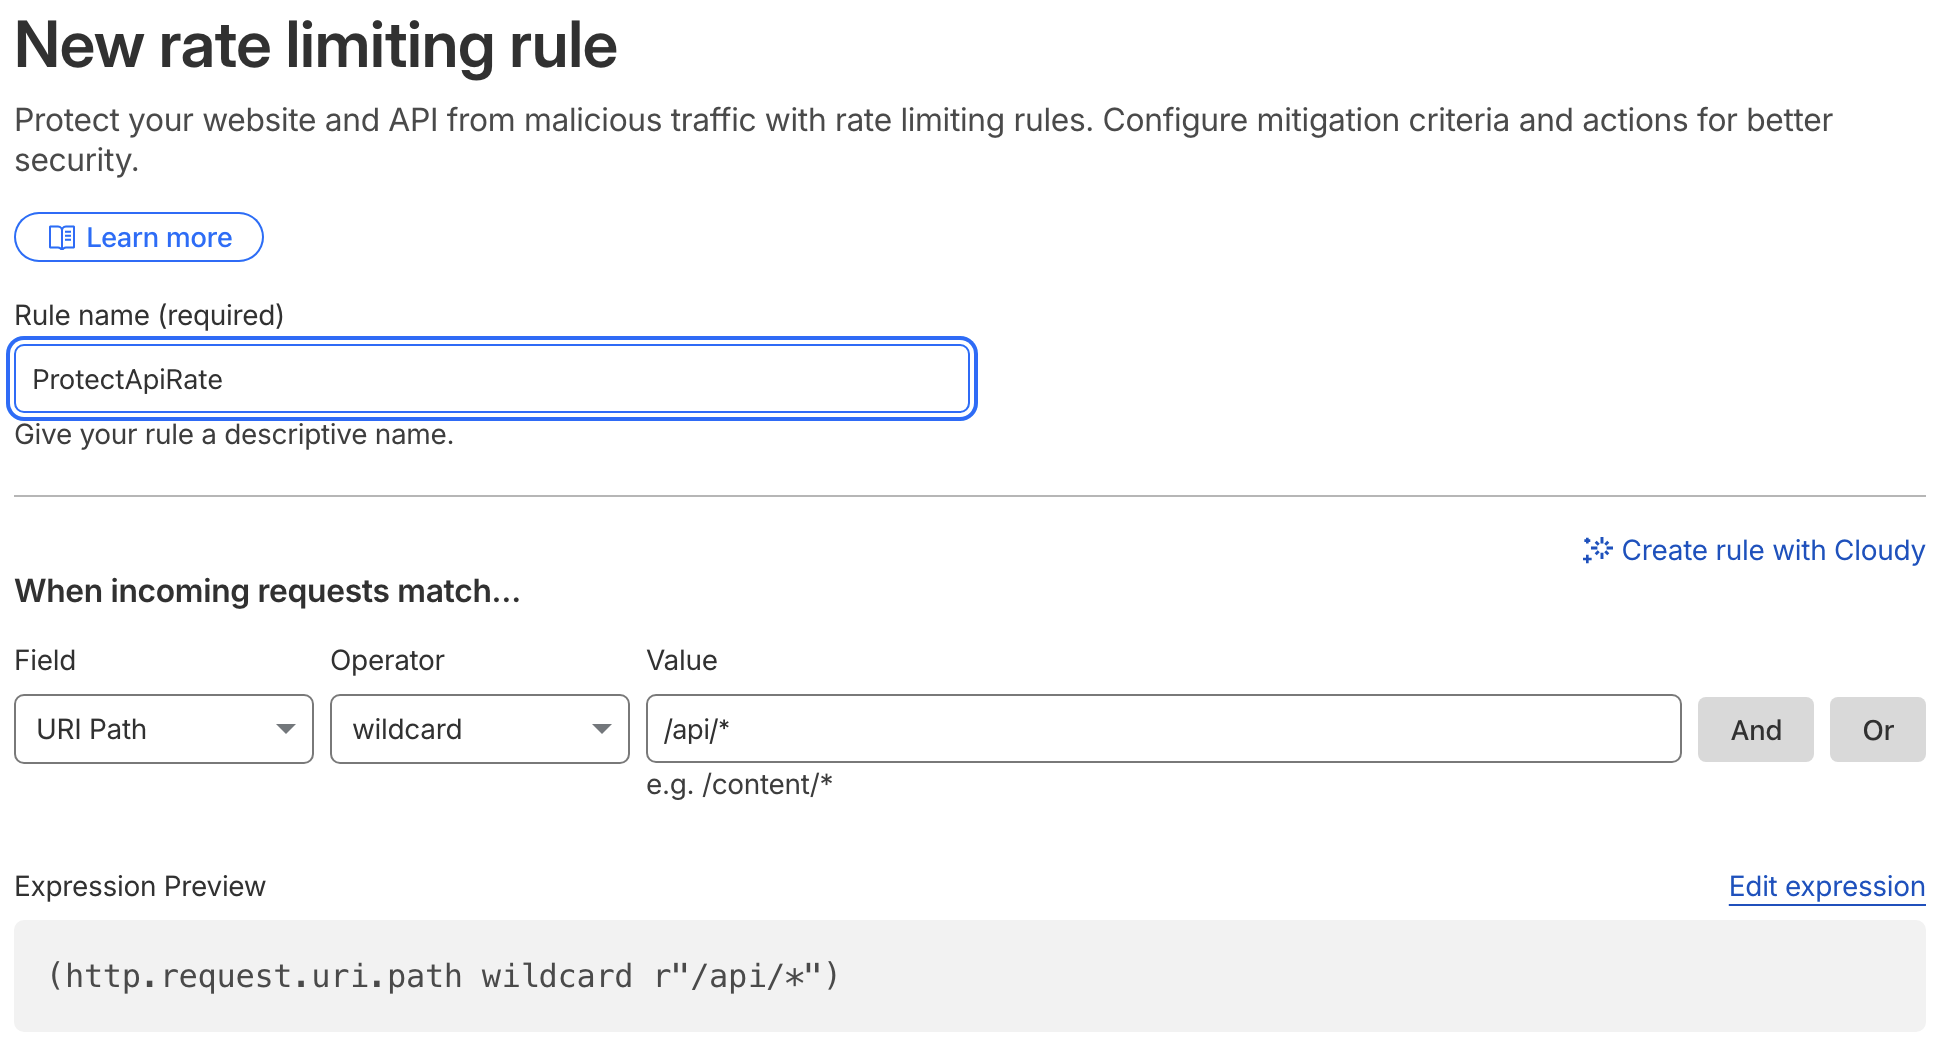
The configuration shown in the screenshots used:
- Rule name:
ProtectApiRate - Field: URI Path
- Operator: wildcard
- Value:
/api/* - Characteristic: IP
- Requests:
1 - Period:
10 seconds - Action:
Block - Duration:
10 seconds
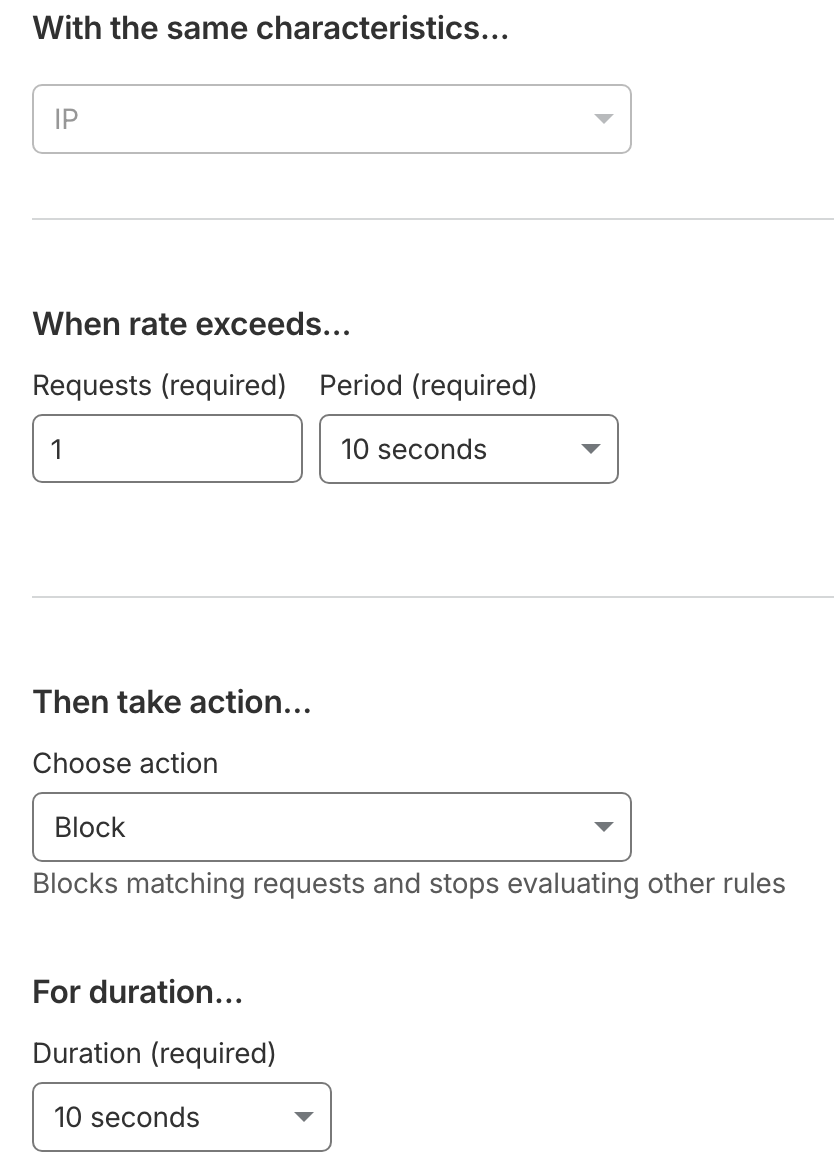
This was intentionally simple and strict.
The goal was not to build a perfect enterprise API protection model. The goal was to add a clear first control that reduced the chance of noisy repeated hits against the exposed API path.
Step 7 - Why I Chose a Small Rate Limit
The API on this site was lightweight and public-facing, and it did not need to support high-frequency client behavior.
Because of that, a small rule made sense.
This rate limit did a few useful things:
- discouraged repeated low-value requests
- added a visible control for API abuse prevention
- demonstrated practical Cloudflare protection for a public endpoint
- made the project stronger from an operational standpoint
This was especially useful because /api/health existed mainly as a validation and portfolio feature, not as a high-throughput production API.
Step 8 - Watch Traffic and Analytics
After the site was live behind Cloudflare, I also reviewed the traffic analytics.
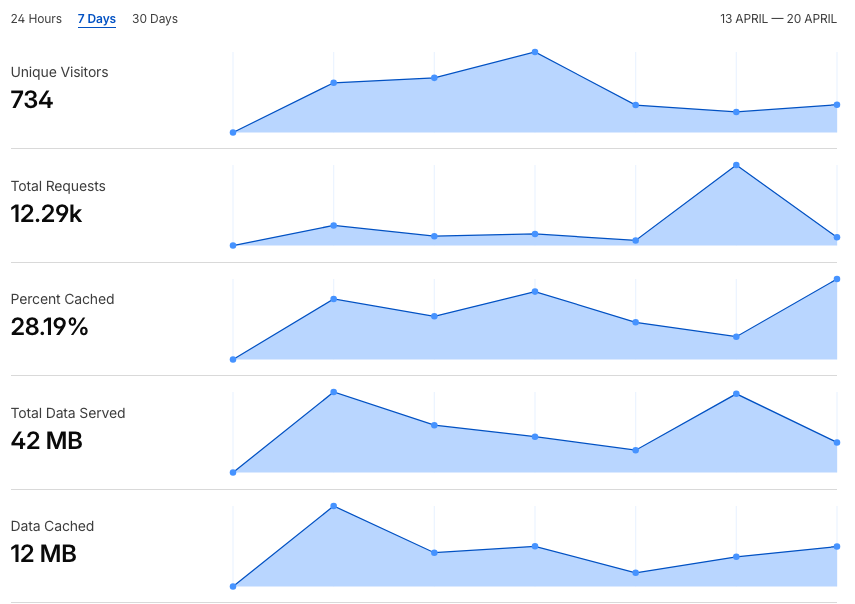
The analytics view showed that the site was receiving real public traffic, including:
- unique visitors
- total requests
- cached percentage
- data served
- cached data
The 7-day view showed noticeable request volume despite the site being a relatively small portfolio project.
This reinforced an important lesson: once a site is public, it quickly starts receiving background traffic, scans, crawlers, and automated requests.
That made the Cloudflare protection work feel justified rather than theoretical.
Result
At the end of this stage, the site had a much stronger edge security posture.
The Cloudflare setup now included:
Full (strict)SSL/TLS mode- forced HTTPS behavior
- Cloudflare proxying for the live hostname
- Bot Fight Mode
- custom security rules
- API rate limiting
- traffic visibility through analytics
This did not make the website “perfectly secure,” but it did make it more realistic, better controlled, and more aligned with good public cloud habits.
What This Part Demonstrates
This part demonstrates:
- practical edge security configuration
- stronger HTTPS and TLS handling
- security-conscious Cloudflare setup
- explicit rule-based traffic control
- basic API protection through rate limiting
- awareness of public internet traffic behavior
- operational thinking beyond deployment alone
What I Learned
A few practical lessons stood out from this stage:
- Public websites start attracting unwanted traffic quickly
- Full (strict) and HTTPS enforcement are foundational settings
- Small projects still benefit from simple but intentional security rules
- API paths deserve separate attention from static page requests
- Analytics help explain why edge protection matters, even for a portfolio site
Final Reflection
By this point, the project had moved well beyond a basic static deployment.
It now included:
- Azure Static Web Apps hosting
- Azure Functions integration
- custom domain and DNS setup
- Cloudflare edge routing
- HTTPS enforcement
- basic bot and rule-based protection
- API rate limiting
- traffic observation through analytics
That combination made the website a much more complete cloud portfolio project. It no longer demonstrated only deployment. It also demonstrated practical public-facing security thinking.